
A little more than two years ago, my friend Dave had an idea: he wanted to do a weekly podcast called “Off the Chain,” on which he would talk about things he thought were off the chain: chiefly, his love of Vin Diesel and terrible action movies. I couldn’t care less about Diesel or action movies, but I like making things, I used to have a radio show on a student radio station here in Madison (it was called ‘Steel’s Magnolias’!), and I have some experience as a DIY audio engineer, so I told him it sounded like fun and I’d help him do it. Dave lives in Arizona, I live in Wisconsin, and most of our friends are scattered across North America, so we needed to figure out a way to record audio conversations with people in 3 or more different locations. It sounded tricky, but I guessed there was probably a cheap, easy way to do it.
Two years on, we’ve made more than 70 episodes of Off the Chain with Dave & Steel, and I have a pretty good handle on how to set up the audio recording/production for a quick and basic podcast. Our total expenses over the two years have been less than $50: Dave bought an inexpensive USB microphone (which he rarely uses — we’re rank amateurs!). Our web costs are essentially zero, but only because I’ve been using a subdomain of an existing domain registration and putting up our files on an existing shared hosting account I have.
I’ve had a couple of friends express their interest in making their own podcasts, and since I’m not aware of a comparable guide out there on the open web, I decided to write this article based on my recent experience. If you use a computer running Windows, Linux, or some other operating system, you’ll need to find software replacements. I may get around to updating this guide with suggestions for other OS environments, but for now this will be a Mac-centric article. Sorry!
Our Setup

Here’s how I’ve been recording podcasts on my mac laptop. I go into a quiet, soundproofed space (here are some tips on soundproofing and improving the acoustics of your own space), call Dave and our guest(s) using Google Hangouts, and record the audio from our video call. After the call ends, I edit the recording, add bumper music, normalize and compress the audio, and export as a 64kbs .mp3 file with the desired metadata. Then I upload the file to my server using an FTP client, write a blog post about the episode, link to the uploaded file (using the free PowerPress podcasting plugin for WordPress) and schedule publication for the desired date/time. When it publishes, our RSS feed is updated, which updates the iTunes and Stitcher podcast listings, and we’ve set up WordPress to automatically post to our show’s pretty basic Facebook page. The whole process rarely takes me more 4–5 hours per episode, including recording time.
(FREE) STUFF TO DOWNLOAD:
- LineIn: A free, lightweight software application from a company called Rogue Ameoba for Mac OS. This lets you play your own microphone through to your audio input channel — it’s a super simple application, and literally consists of a single button, but it’s pretty important. It appears they now have a better product called SoundSource ($10 or free if you’ve previously bought something from them)
- Soundflower: This free kernel extension for Mac OS lets you mix two or more audio streams into a single stream so that you can record both your own microphone and the people you are talking with in a single application. It’s now being maintained on GitHub by Matt Ingalls. Rogue Ameoba now sells a similar but even more powerful product called Loopback (which costs $99 for a new license)
- Audacity (you can use GarageBand if you’d rather, but I was trained on Audacity, and like it because it’s open source). This is the program that I use to record and edit the audio. You’ll also likely want to download an mp3 encoder, which you’ll need if you want to export your audacity files to the .mp3 format. [encoder for mac | encoder for Windows]
WHAT TO DO:
- Install all three applications.
- Open LineIn. Select your recording device from the ‘input’ drop down menu, and select ‘soundflower (2 ch)’ from the output dropdown menu. Then press the ‘play thru’ button.

Sample view of the LineIn application - In your video/audio chat tool, open your settings and set your speakers to ‘Soundflower 2ch’. This will send the incoming audio from your guests to the Soundflower 2ch stream, where your mic is also being set (effectively making them one channel).
- Open soundflowerbed. Under ‘Soundflower (2ch)’, select ‘built-in output’. This will let you listen to the pseudo-single channel mix on your headphones (for monitoring purposes) while you record. You should hear yourself and your guests through your headphones. Your own voice may have a slight delay, which you may be able to reduce slightly by changing the buffering settings in Soundflower.

View of the Soundflower controls (they’ll appear in the Mac OS menu bar at the top of your screen) - Open Audacity. Make sure the recording source is set to Soundflower (2ch). Start a call and start recording — the recording should pick up both your audio (routed from your mic to Soundflower 2ch by Linein and your other participants audio (send to Soundflower 2ch by your chat applications settings). There’s a few more little things you can do to tweak settings and all that, but that’s basically it.

View of the recording dropdown in Audacity
OTHER TIPS:
- The sound quality of your recording will depend on two things: the recording instrument you use (a dedicated external microphone will almost always sound better than your laptop’s built-in recording device) and the quality of your video/audio connection (when we’ve had more than 2 people in a call and had buffering/stuttering issues, we’ve had participants mute their video and the audio issues usually resolve).
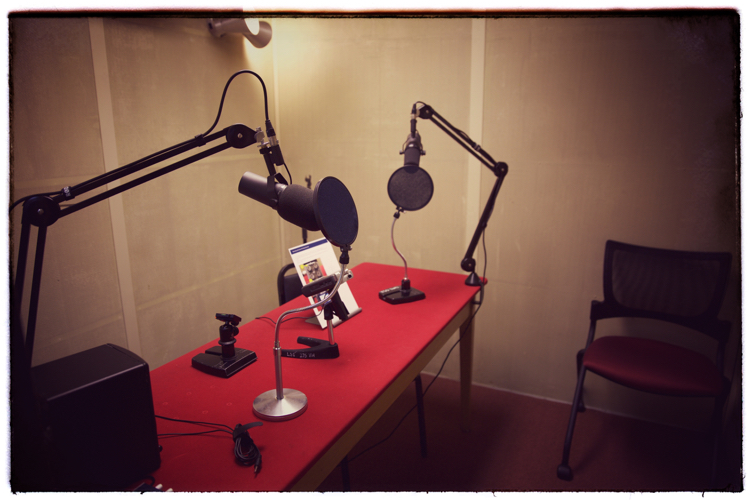
- Recording equipment. If you’re going to be doing this for a while, I’d recommend buying a nice microphone. There are two ways to approach this. If you’ll always be recording with your computer present, get a nice simple USB mic. Blue makes good microphones — you can get either the Snowball (~$50) or the Yeti (~$130) and both will sound much better than your built-in laptop mic]. If you will be doing field recordings or talking with people in situations where you don’t have your laptop, I’d consider getting a digital recorder with a USB input. I like the Zoom H2N or H4N (both very good, with a clear edge to the H4, which is what I use to record my audio).
- Audio recording levels. This is a big deal, and it’s a little counter-intuitive, actually. The key thing here is not to record too loudly. If your audio input maxes out the extra decibels are clipped (lost) and it sounds terrible. I try to have my max peaks come in around -12 dB (you can see a little visual on your recording panel in audacity). It’s also good to try to have everyone who’s being recorded come into the mix at roughly the same volume, obviously. You can turn down your input source and adjust your overall balance in audacity or instruct people to speak up or turn their inputs down as needed.

Example of dB levels input visualization in Audacity. Peak volume represented by the end of the color bar. Green=good, yellow=watch out, red=too loud. - Monitoring while recording: When I record, I always wear a pair of headphones with one ear on and one off so I can hear what’s happening in the room I’m in as well as what’s happening in the call itself.
- Editing and post-recording production. It’s up to you how much you want to edit stuff, obviously, but it’s really easy and addicting to do in Audacity. The biggest thing I’d recommend doing even if you don’t do any in-file editing is to normalize [bring the audio up to a desired max volume, basically] and compress the audio before exporting. Audacity has a built in compressor plug-in, and I always run it on my audio files before exporting. Compression is super cool — what it does is reduce the absolute volume difference between your loudest and softest sounds, while still preserving the relative loudness/softness of all sounds. So the loud stuff is still louder than the quieter stuff, but within a compressed dynamic range. Normalizing can be helpful too, because it brings the loudest part of your recording right up to the max volume without clipping. This is why I recommend recording with your peaks some distance below 0 — you will never experience clipping, and your audio gets boosted to optimal levels during normalization/compression before you export. If you have questions, feel free to ask — I’m not an audio engineer, but have some interest and experience.

My preferred compression settings for speech: Threshold: -18db; Noise floor: -40dB; Ratio: 4:1; Attack time: .1 sec; Decay time: .8 sec; select ‘Make up gain for 0 dB after compressing’; leave ‘Compress based on peaks’ unselected]. - Export settings. I prefer to export to mp3 at 64kbps [kilobytes per second]. Because you’ll likely be doing voice only, you can choose a higher rate of compression (lower kbps in your settings). The BBC’s standard for voice only podcasts is 64kpbs, which is what we use for our podcast, but you can try it in 96 to see if the difference is audible and matters to you.
Have fun! I’m happy to be a resource as needed, especially as you get started. Making radio/podcasting is a blast, and super addictive. Can’t wait to listen what you make!